-
Introduction
-
Hardware
-
System setup
- Setting up VIVE Mars CamTrack
- Example virtual production studio setup
- Connecting Mars to your PC
- Mounting VIVE Tracker (3.0) to Rover
- Connecting Rover to Mars
- Setting up the base stations
- Tips for setting up the base stations
- Adding Mars as an endpoint in Unreal Engine
- Enabling FreeD on Mars and adding Mars to Aximmetry
- Manually updating the Mars firmware
-
Camera calibration
-
Real-time compositing in Unreal Engine
-
FAQs
- How many base stations can I use?
- Can I use an odd number of base stations?
- Cleaning the base stations
- Can I use more than one VIVE Tracker (3.0)?
- Why does VIVE Tracker (3.0) automatically turn off?
- How do I verify that VIVE Tracker (3.0) is detected?
- What does the status light on VIVE Tracker (3.0) mean?
- Why doesn't the VIVE Tracker (3.0) status icon on the Mars dashboard turn blue?
- Troubleshooting VIVE Tracker (3.0)
- Why can't I see the incoming video feed in the Camera Calibration Tool?
Collecting calibration data using the Camera Calibration Tool
The
Camera Calibration Tool captures images to generate calibration data that you can import into your virtual production engine to calibrate your camera.
If you haven't downloaded the Camera Calibration Tool, visit www.vive.com/mars/cct.
-
Attach a
Rover module to your camera, with the front side of
Rover parallel to the camera lens.
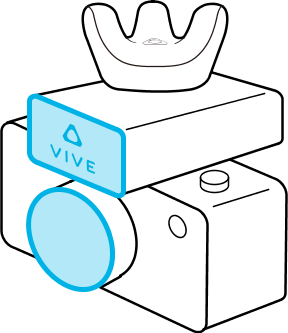 Note: The internal screw thread on the bottom of Rover has a depth of 5.5 mm. To avoid damaging Rover or your camera during installation, make sure the exterior screw thread on your camera is no longer than 4.5 mm.
 -
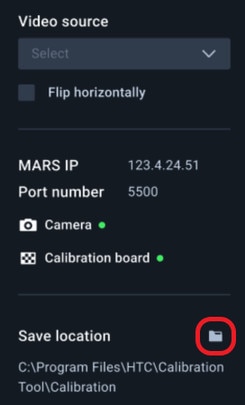
On your PC, open the
Camera Calibration Tool, enter the
Mars IP and port number, and then click
Connect.

-
Select your video capture device from the
Video source dropdown menu.
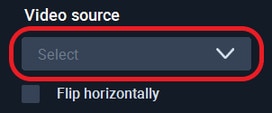
Tip: If the video feed is inverted on the x-axis, you can select
Flip horizontally to correct it.
-
For
Save location, click the folder icon
 and select a destination folder for the images and calibration data.
- Click the play button to start the calibration process.
-
Move the camera so the chessboard pattern falls inside the red frame.
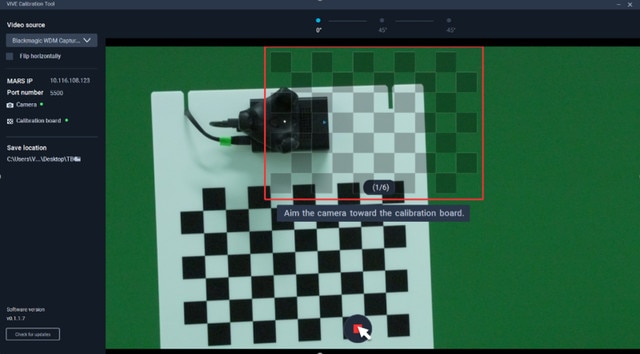
The frame will turn blue, and the Camera Calibration Tool will capture an image.
- Move the camera as needed to capture additional images until you're prompted to rotate the calibration board.
-
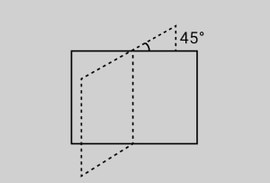
Rotate the calibration board 45 degrees (counterclockwise), then click
Continue and capture a second set of images.
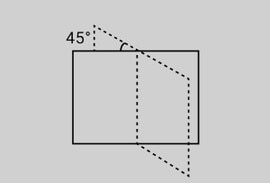
After capturing the second set of images, you'll be prompted to rotate the board 45 degrees in the opposite direction.
-
Rotate the calibration board 45 degrees clockwise (-45 degrees), click
Continue, and then capture the third and final set of images.
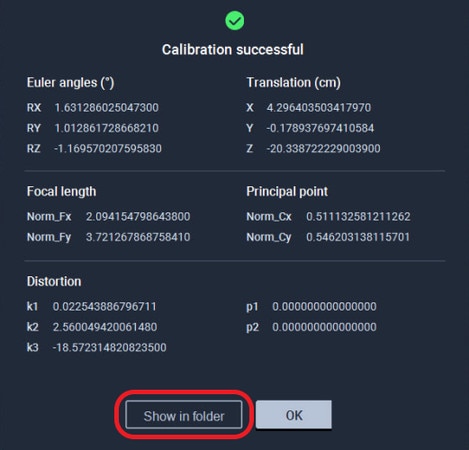
The Camera Calibration Tool will process the images and display the results. Click Show in folder to open the save location containing the images and calibration data.
-
Import the calibration data into your virtual production engine to calibrate your camera.
For details, see Importing calibration data into Unreal Engine.
Was this helpful?
Yes
No
Submit
Thank you! Your feedback helps others to see the most helpful information.