-
Overview
-
Getting started
-
Assembly
-
Setup (headset and controllers)
-
Setup (play area)
-
Basics
-
Mixed reality
-
Additional accessories
-
-
Managing screenshots, files, and apps
- Connecting the headset to your computer
- Transferring screenshots and screen recordings to your computer
- Browsing and viewing files
- Viewing 360° photos
- Connecting an external storage device to the headset
- Transferring files between the headset and an external storage device
- Installing apps on the headset
- Installing APK files on the headset
- Uninstalling apps
- Changing app permissions
-
Using VIVE Manager
-
Sharing and streaming content
-
Settings
- Connecting to a Wi-Fi network
- Setting a device passcode
- Installing system and firmware updates
- Resetting your headset (factory reset)
- Adjusting the power frequency
- Choosing a display mode
- Setting a timeout for sleep mode
- Adjusting audio settings
- Choosing a tracking mode
- Pairing Bluetooth devices
- Setting up and using Kiosk mode
- Adding a VPN connection
-
VIVE XR Elite for Business
-
Solutions and FAQs
-
General
-
Hardware
- What should I do when the headset is unable to detect the controllers?
- How do I check the battery level of the headset and controllers?
- Why isn't the battery percentage displaying correctly?
- Why does my headset turn off when it's connected to a power bank?
- Why won't the headset turn on?
- How long is the USB-C to USB-C cable that comes with the headset?
- Can I connect a wired USB-C audio device to the headset?
-
Apps and content
-
Setting up your headset for the first time
VIVE Manager requires Android 9 or later, or iOS 12 or later. To download the app, you can go to the VIVE XR Elite Setup page or search for the app on the Google Play Store or App Store.
- Turn on your headset. See Turning the headset on and off.
- Launch VIVE Manager on your phone.
- On the Welcome screen, select VIVE XR Elite.
- Select Controllers and Battery cradle if you have these accessories and then tap Next.
- Follow the onscreen prompts to grant permissions to VIVE Manager.
-
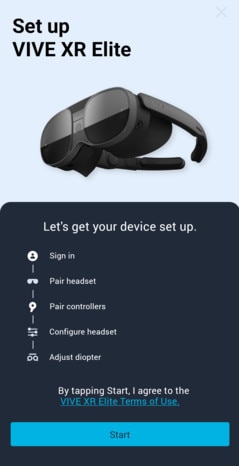
Tap
Start to begin setting up your headset.

- Sign in with your HTC account, or tap Create an account to create a new account using your email address or phone number.
-
Follow the onscreen instructions to set up the following:
Task Steps Pair VIVE Manager with your headset When your headset receives a pairing request from VIVE Manager, the front headset LED will flash white. When the LED starts flashing, press the headset button. Choose a Wi-Fi network Connect your headset to a Wi-Fi network by entering the login credentials or scanning a Wi-Fi QR code. Note: If you select a corporate or public network that requires connecting through their login page, you'll need to complete the login process in the headset.
Pair controllers Turn on the controllers. The headset can automatically pair with the controllers that came in the box. You can also pair controllers manually. Grant access permissions to allow phone mirroring (Android phones only) In Accessibility Services and Modify system settings, tap Grant and enable these permissions. Tip: After granting a permission, tap the back arrow until you're on the VIVE Manager screen again.
-
If there's a system update available, make sure to install it to get the latest features and enhancements.
After installing the system update, tap Restart in VIVE Manager to restart the headset.
-
On the
Get in focus screen, tap
Confirm. Then put on your headset and continue with setup.
Follow the instructions in the headset to adjust the diopter dials, IPD, and volume, and define your play area. You can also refer to the following topics:
To learn more about VIVE Manager, see About VIVE Manager.