-
簡介
-
硬體
-
系統設置
-
攝影機校正
-
在 Unreal Engine 上即時合成
-
常見問題集
將校正資料匯入 Unreal Engine
以下是使用攝影機校正工具收集的校正資料來設定虛擬攝影機的方法。
-
開啟包含校正資料的 TXT 檔案。
-
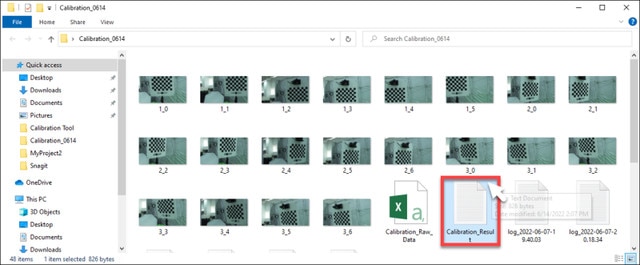
開啟儲存位置並找出 Calibration_Result.txt。
-
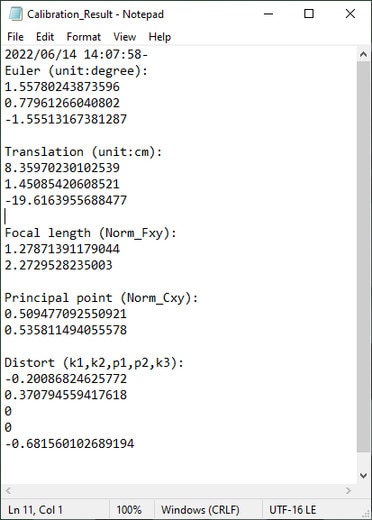
在檔案上按兩下開啟,並檢視校正資料。保持檔案開啟以便參考。
-
開啟儲存位置並找出 Calibration_Result.txt。
-
在 Unreal Engine 中,啟用 Camera Calibration 外掛程式。
-
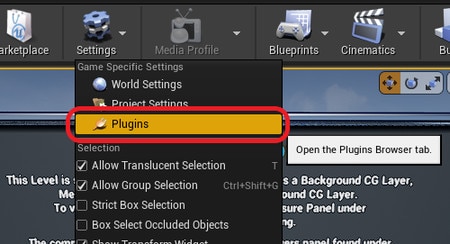
按一下 Settings > Plugins,開啟 Plugins 瀏覽器分頁。
-
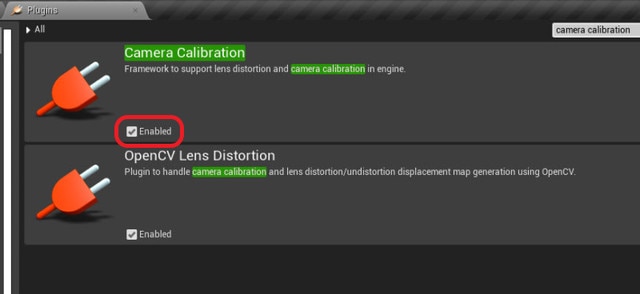
搜尋 camera calibration,然後選取 Camera Calibration 外掛程式底下的 Enabled。
出現提示時,請重新啟動 Unreal Engine。
-
按一下 Settings > Plugins,開啟 Plugins 瀏覽器分頁。
-
在 Content Browser 面板內按滑鼠右鍵以開啟內容選單,然後前往 Miscellaneous 並按一下 Lens File 以建立鏡頭檔案資產。
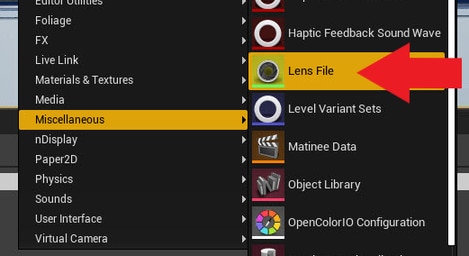
-
在 Content Browser 面板中,按兩下鏡頭檔案資產以開啟鏡頭檔案資產編輯器。

-
按一下 Calibration Steps 面板並為攝影機指定 Sensor Dimensions,然後按一下 Save Lens Information。
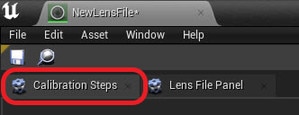
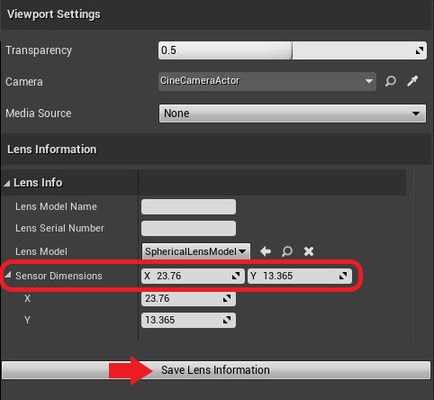
-
按一下 Lens File Panel,並選取 Focal Length。
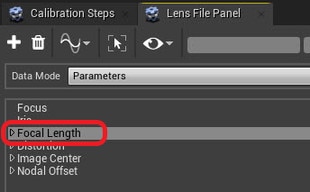
-
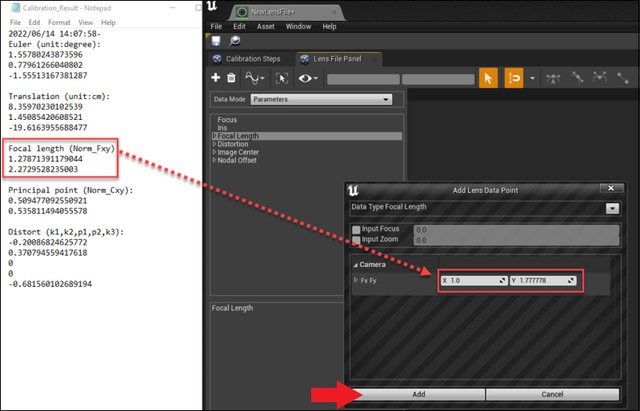
按一下 + 按鈕以開啟 Add Lens Data Point 視窗,接著輸入 Calibration_Result.txt 提供的焦距值 (Fx, Fy) 後按一下 Add。
-
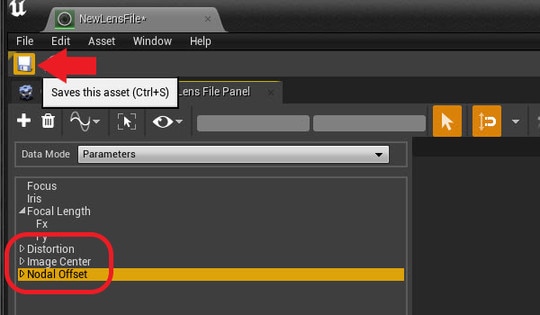
針對Distortion、Image Center 及 Nodal Offset 執行相同步驟,然後按一下 Save 按鈕。
-
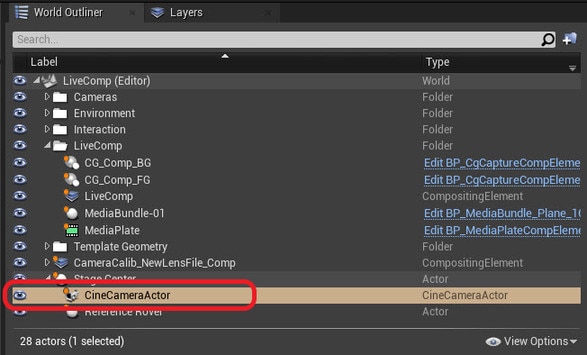
在 World Outliner 面板中,選取您的 CineCameraActor。
-
前往 Details 面板,並選取 LiveLinkComponent Controller。選取 Live Link Camera Controller 做為 Camera Role,然後選取鏡頭檔案。
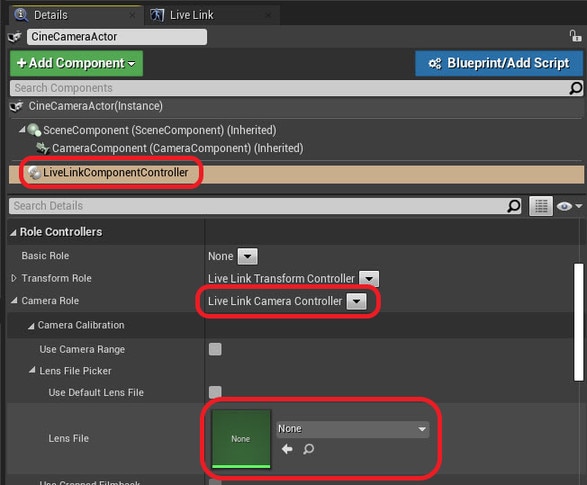
您也可以從 Content Browser 面板中拖放鏡頭檔案資產。
現在校正資料將會套用到虛擬攝影機。
這對您有幫助嗎?
是
否
送出
感謝您!您的意見回報可協助他人查看最實用的資訊。